
I often create thumbnails for images to be posted on various webpages. Instead of using Photoshop or some other image editor I wrote a simple Automator workflow to convert an image to a nice little thumbnail with ImageMagic.
Note: I prefer my thumbnails to be 150×100 pixels. You can adjust accordingly for your desired sizing.
Requirements: Automator, ImageMagic

Workflow Breakdown
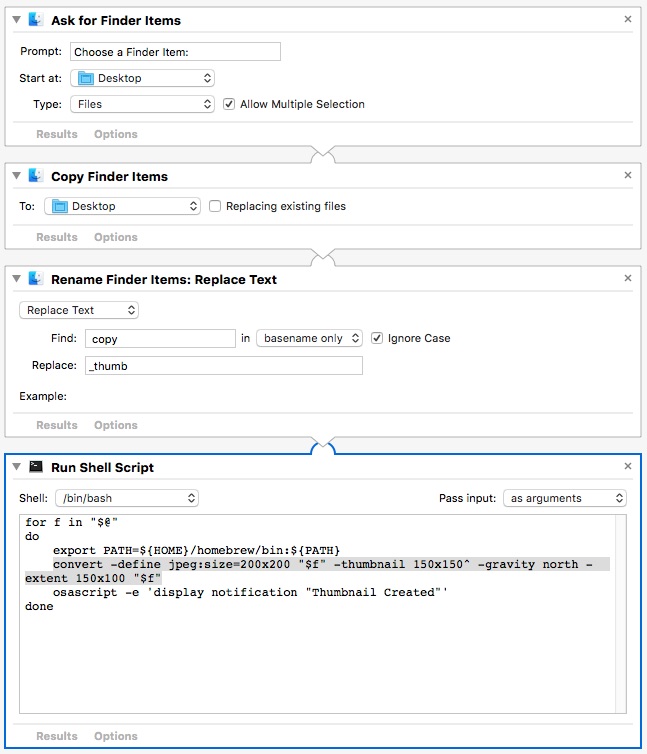
Ask for Finder Items this tells Finder to give you a file selection window.
Copy Finder Items This makes a copy of the previously selected file.
Rename Finder Items: Replace Text This adds _thumb the to above file.
Run Shell Script
convert -define jpeg:size=200x200 "$f" -thumbnail 150x150^ -gravity north -extent 150x100 "$f"
The above command converts the image (settings breakdown below)
-define jpeg:size=200×200 – This shrinks the image to increase operation speed.
-thumbnail 150×150^ – Similar to resize but optimized for speed.
-gravity north – Using geometry to position the from the top.
-extent 150×100 -Background composing.
osascript -e 'display notification "Thumbnail Created"'
The above command converts displays a Notification when completed.
Feel free to take the Workflow and edit as needed.